November 2, 2021
MZ's layer function has opened up a lot of option for making water tiles more exciting, but by default graphics, and most graphics that have been made for MZ, don't take advantage of it. Let's look at making those changes ourselves!
We had a look at making out own grass and rounded cliffs, but there are some other things we should talk about:
Changes in MZ's mapping features gave us possibilities that you didn't have before, but there are barely any resources out there that take advantage of them.
So let’s have a look at some things I would highly recommend!
Side note: you can technically use these techniques for MV as well, but there a fixed background is needed, so further edits are necessary. And when you make a setup like this, you should be comfortable with shiftmapping!
Take the water you like most and don’t care about where it is placed on the sheets or what ground surrounds it:
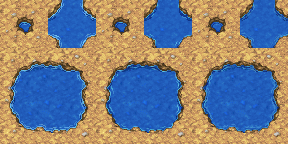
I personally like the earth cave water, two things have to be good:
Now it depends on which tile you picked, for the earth cave here, the best solution is to go in with a pixel program like graphicsgale and manually draw in the border between “ground” and “edge” and fill in everything that is just basic ground with transparency:

With a steady hand and a good eye this is a job of maybe 5 minutes, as you have to do only one of the three steps and can copy and paste the “covering part” into the other frames.
Now either swap out one of the default water autotiles for the new one or create a new sheet with just this one.

If you compare it to the default set, well, it looks a bit different, so what is the huge advantage?

But as soon as you have several biomes or ground types that share a border with the water, this edit will come in VERY handy, as even with shiftmapping with water with the other ground, you will have some nasty edges that don’t fit well.
And there is another big plus:
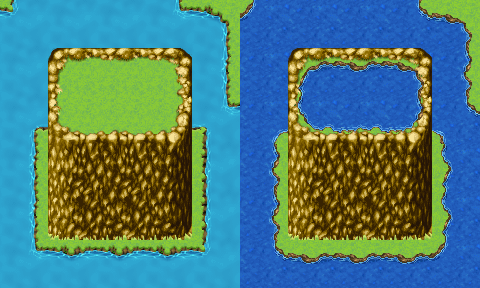
Since the ground is transparent, you can finally map them on top of cliffs, great for breathtaking landscapes with waterfalls. Wait… waterfalls?
The default waterfalls are neat, but they have the same problems as the water: I cannot map something behind them, no wall variation, no half-hidden door… or can I?
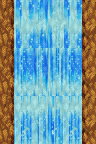
Take the waterfall that matches your water.
Now open the matching A5 sheet and create that wall part as it would be without the waterfall:

Now create a new document in Gimp. Your lower layer is the waterfall, the upper layer is the wall.
Invert the wall colors, so it looks like this:

Now set the mode with this inverted wall to “HSV Value” and it’s opacity to 50:
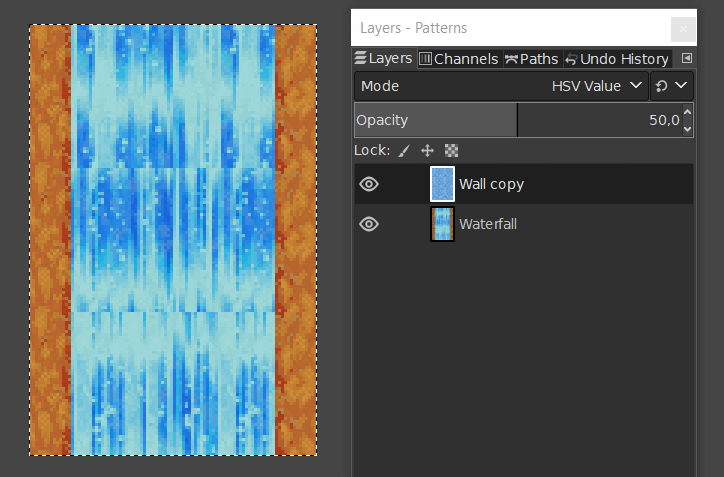
And most of the wall pattern that was behind the water, has vanished!

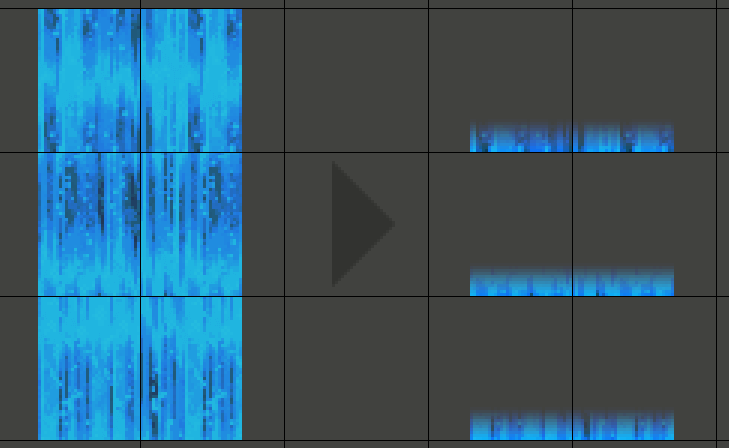
Use the available color options - I personally prefer “curves'”, but you can also go in with hue/saturation and contrast or whatever works for you until the water has a vivid coloring that suits your needs.
Now remove the two strips on the side and copy it into your water autotile sheet.
You don’t have to aim for bright colors and opaque, with that base you are free to do whatever you like, you could also recolor it to match the water color better and set some transparency:
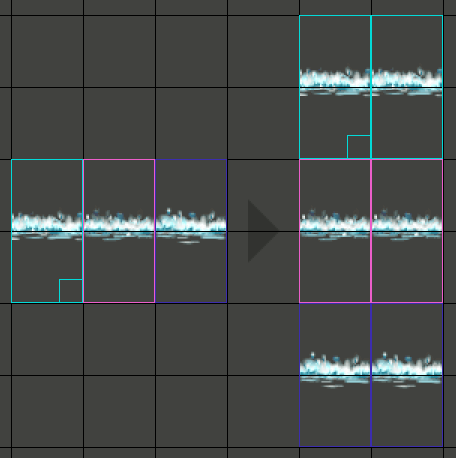
left: “original”, center: the edited waterfall, right: the edited waterfall recolored with some transparency.
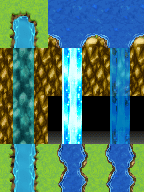
You can already see what a difference this makes! I placed a door behind the edits to show that this is now easily possible.

This is by the way to color I settled with, but for your own edit you can pick anything that suits you!
Now we have freed up a lot of tiles on our A1 sheet.

If we don’t need the variation for sure, our versatile waterfall and water without a fixed background replace 5 of the water sets and the 4 waterfalls on the A1 sheet, which gives us room for edits that make our water setup look even nicer!
For example this:
Simply copy your waterfall autotile and create a layer mask that fades from a narrow white part to black quickly. You want the same 2 tiles wide one tile high layer mask over all three rows of the autotile, so make one transition you like and copy that over. The result can be placed in one of the waterfall slots on your A1 sheets.
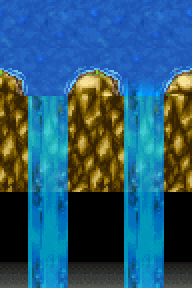
Here you can see a side by side comparison of the impact this little edit makes - the waterfall now flows much more gently over the edge.
But I have some other tricks up on my sleeves!
There is this set of bubbles in the charsets, which gives us a neat “end” for the waterfall.
But due to it being a tiling charset, it is pretty “cut off” at the edges and could be fitted better to the tiles.
Additionally, we still have room on our A1 set now, so why not make that charset a tileset?
Start by assembling your charset like this.

Now make yourself a small test image by mapping the areal, where the splashes will be used and copy that into a new layer behind your set.
With that being done, there are 3 things to do:

After that, all you have to do is to separate the top and the bottom into separate autotiles which you can now add to your A1:
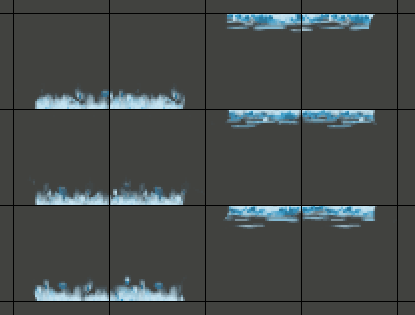
Here you can see the combined impact of all the new assets compared to the “old” ones:

But wait, there's more!

By erasing the background of the water bubbles we can make them more versatile as well. I also recolored them to match “my” water of choice, and now they are usable in this setup as well.
And what about the other empty slots?
Well, how about making deeper water as variation?
Copy the structure of your water of choice to fill up the whole sheet.

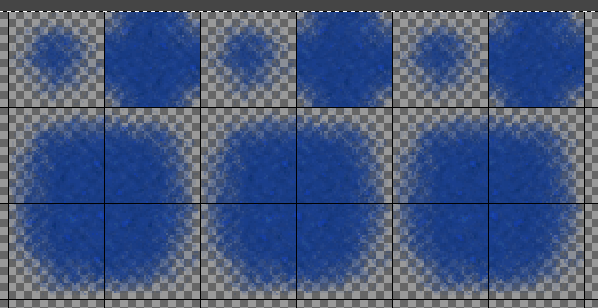
Take the dirt autotile you can find on many sheets (left), make it all white (middle), and duplicate it (I made that twice here). That is the layer mask we need.
Give your all water autotile an all black layer mask and copy your “white dirt” autotile on top of that layer mask three times, so your result looks like this:

You can now recolor it to a darker tone of your liking:
And you are done.

Now you can lose yourself into making breathtaking multilayer waterfalls and other nice water-related settings.